Arduino Projects: 1 Part(s)
This post is my first attempt in learning bare metal embedded programming, and I will be using the Arduino Uno board to make an LED blink. I will be using the Arduino Uno board for this project.
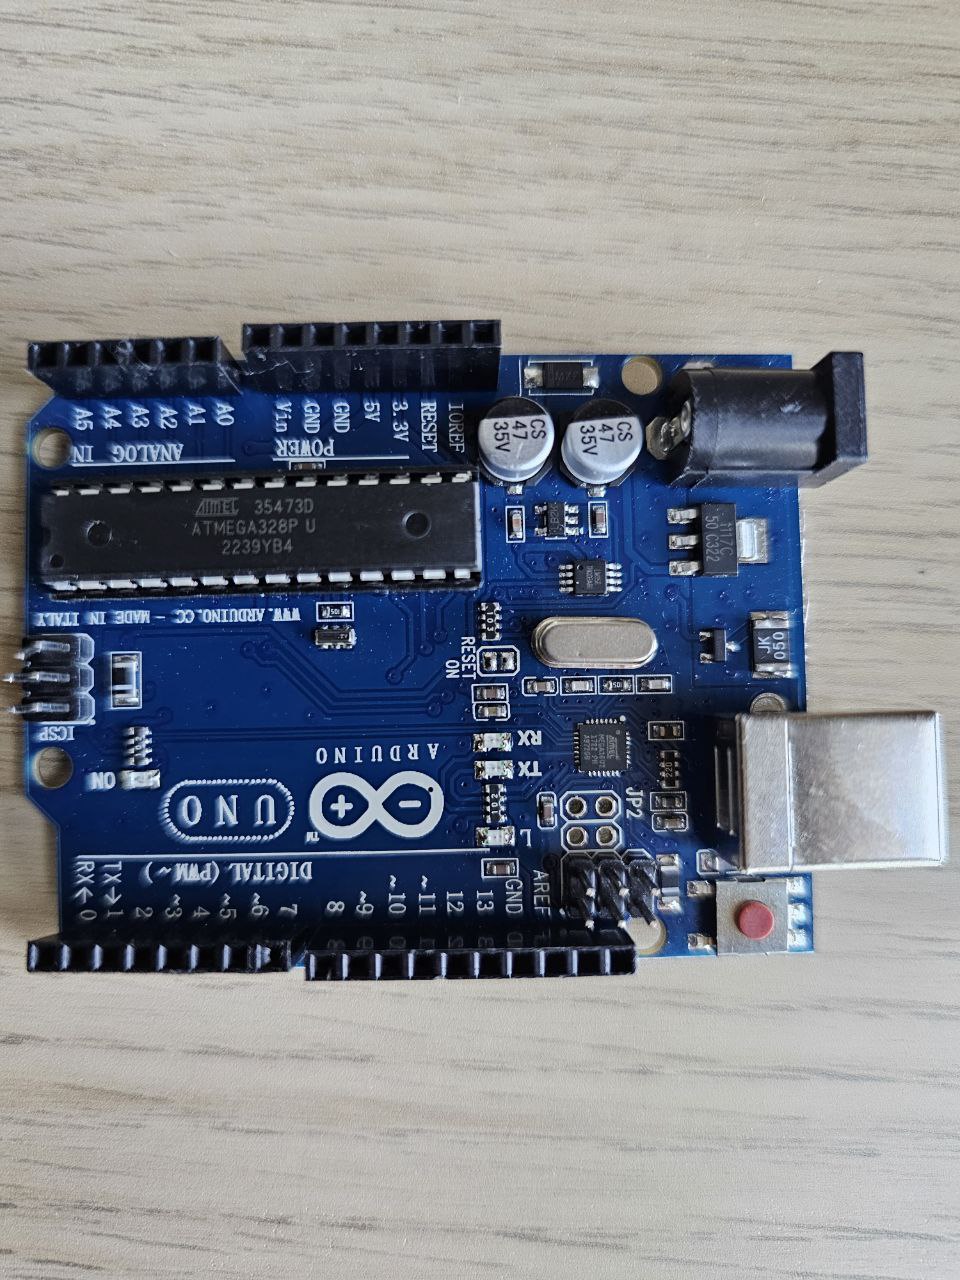 Arduino Uno
What is Arduino Uno? It's a microcontroller board based on the ATmega328P like the one shown in the image above.
In this project, we are going to use GND (Ground) and ~9 pins to make the LED blink.
If you are wondering, the red button is the reset button. Do not worry about the other components on the board, we will not be using them in this project. I do not even know what they are for, but we'll learn along the way.
There are two possible scenarios to install our LED and resistor on the board.
Parallel Configuration
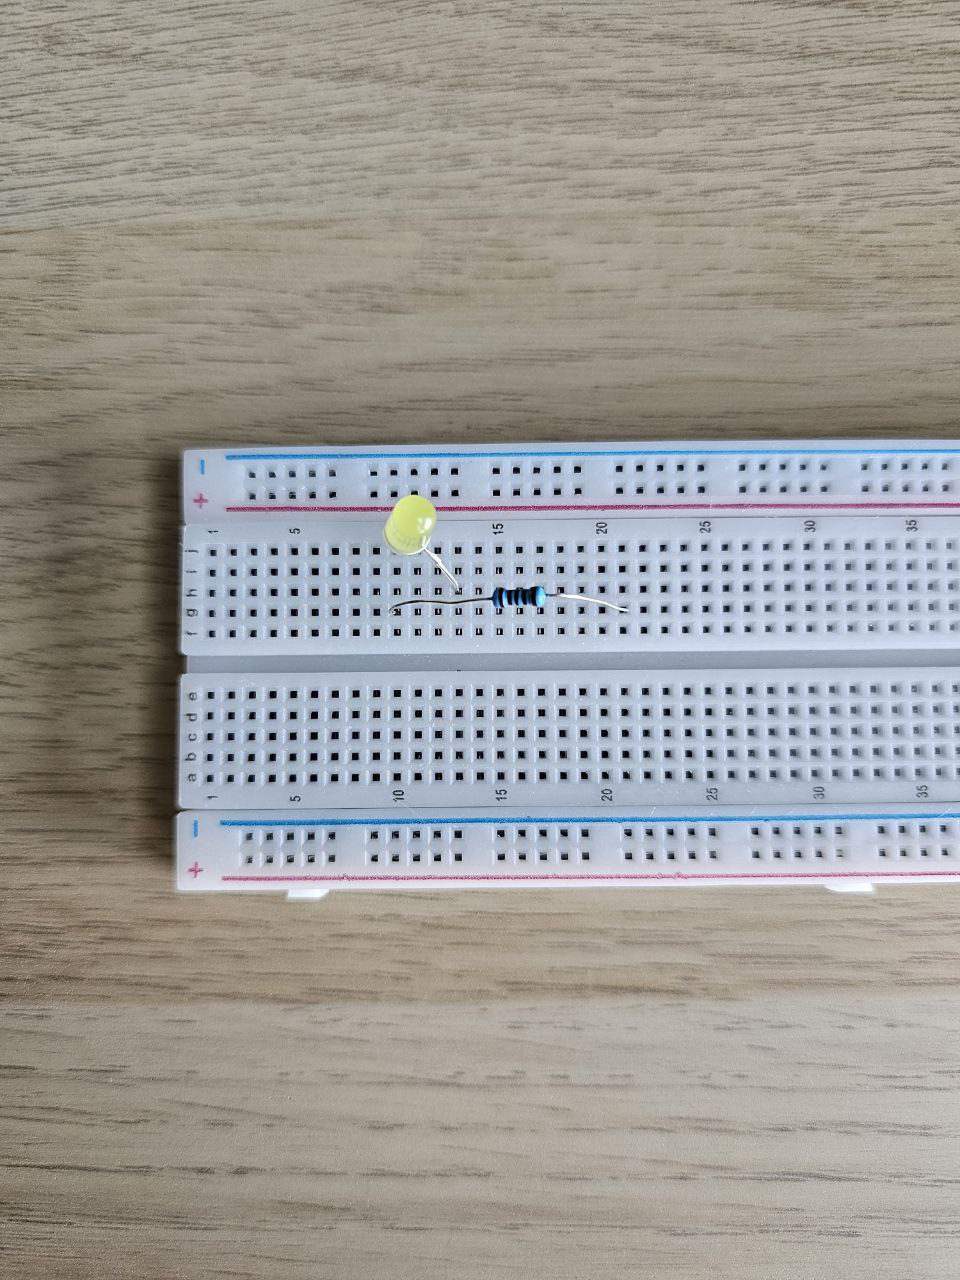 LED and a transistor parallel configuration from the top
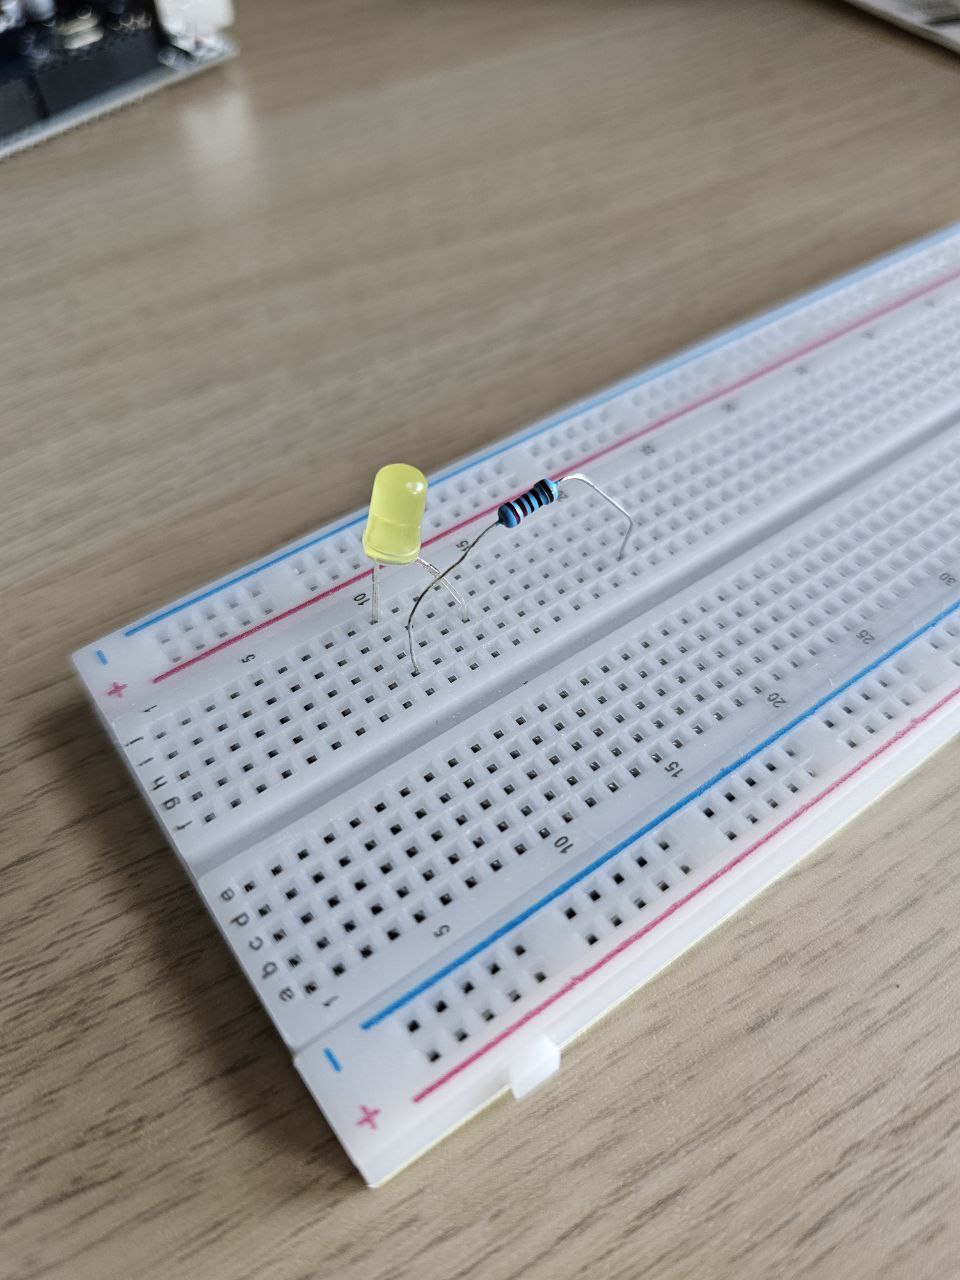 LED and a transistor parallel configuration from the side
At the beginning I thought using the parallel configuration would work, but it did not. I assumed that my LED was broken or the breadboard was not working properly. I also suspected my code was the culprit, but it was not. At the end, I did not find the bug, but I found myself.
There are two possibilities why it did not work?
- Not enough current to light up the LED.
- The current is not flowing in the right direction.
Series Configuration
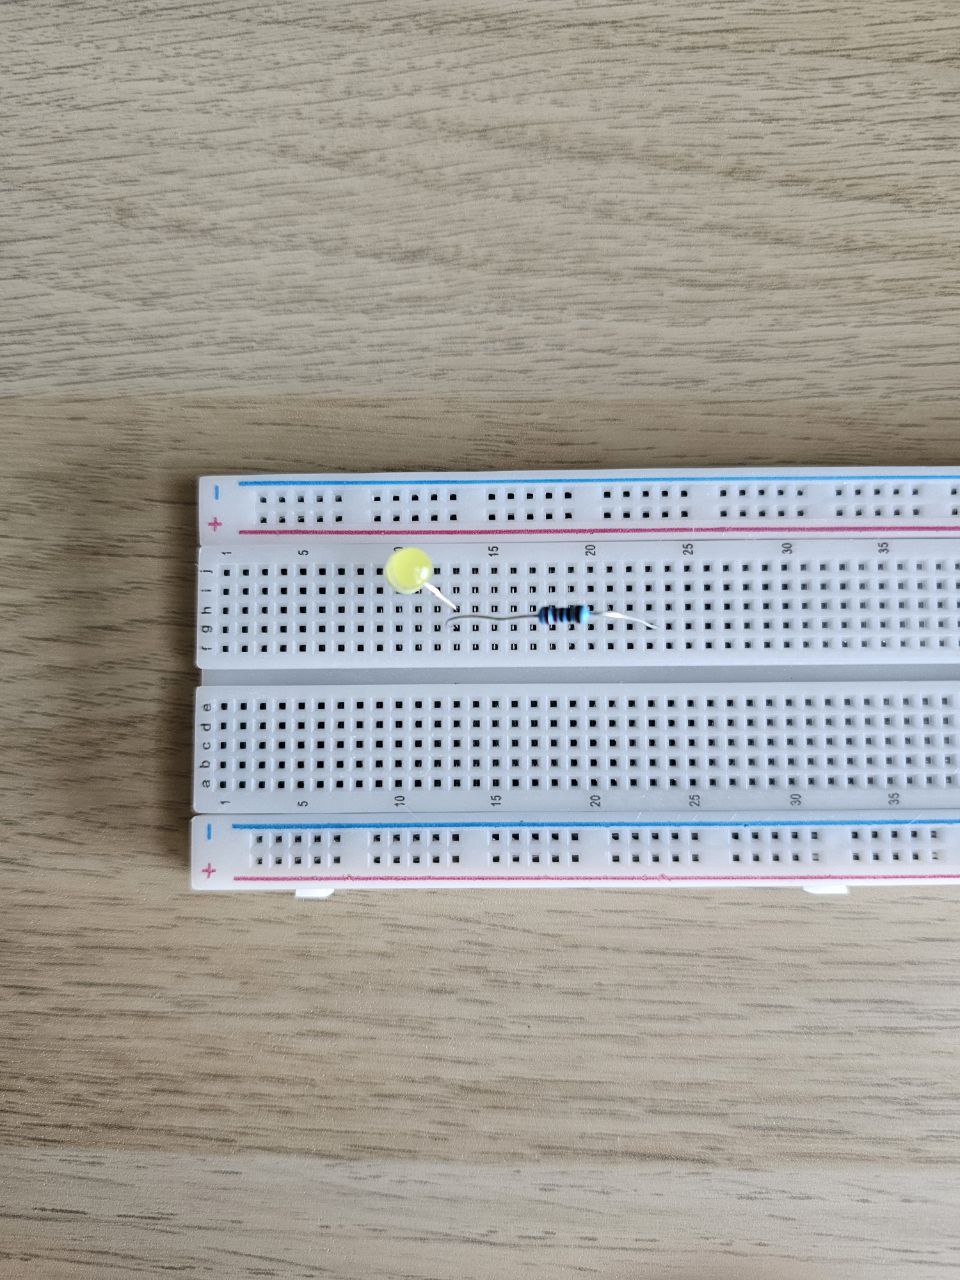 LED and a transistor series configuration from the top
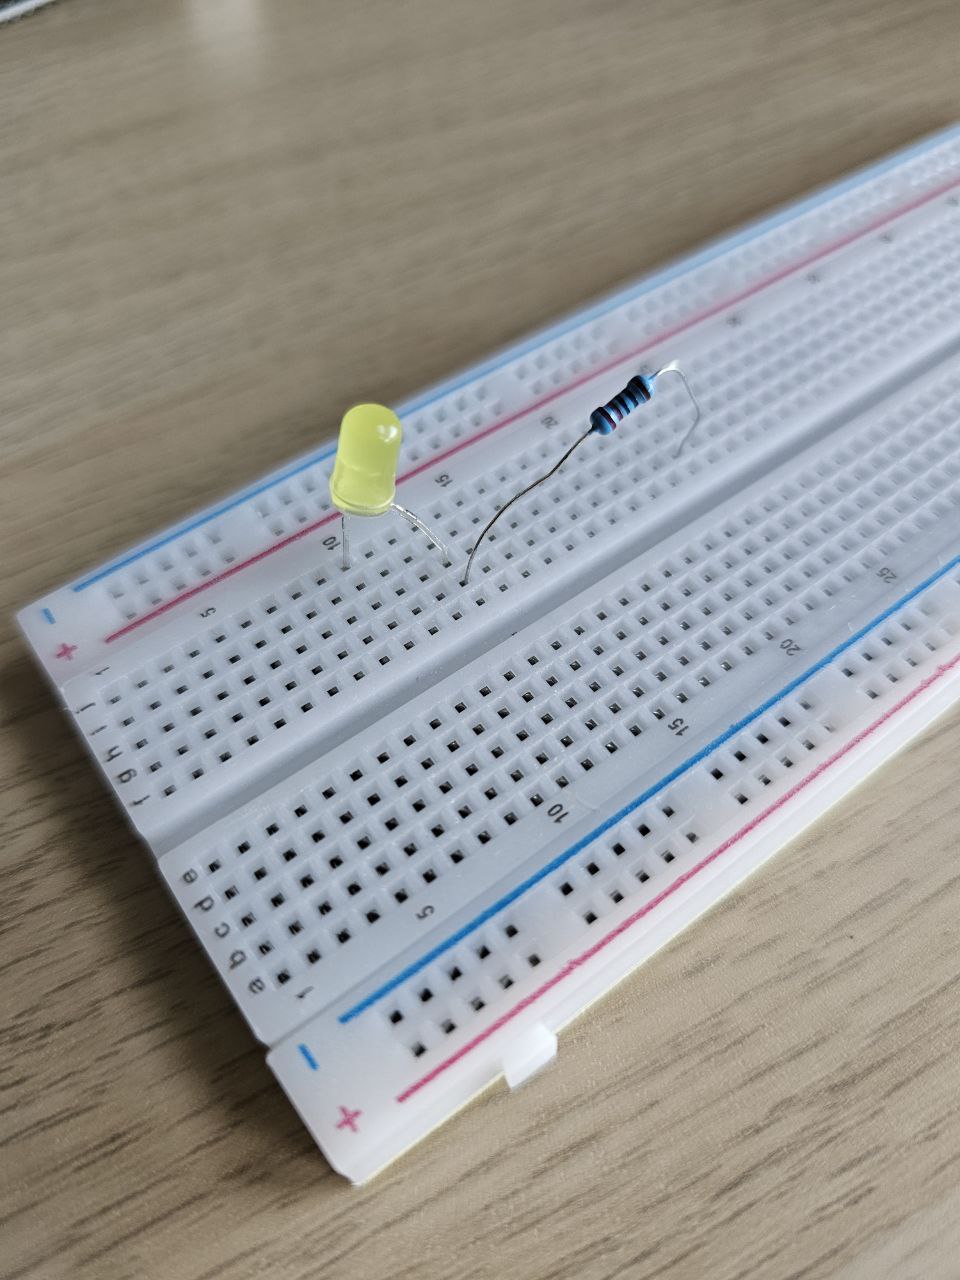 LED and a transistor series configuration from the side
This is the configuration that we want. Make sure the the resistor left leg is connected to the hole under the right leg of the LED, and the right leg can be anywhere within the same row like the images above.
Implementation
Once you're done with the hardware, it's time to write the code.
Remember we are using the ~9 pin to make the LED blink, so define the pin as a constant.
#define led_pin 9

void setup() {
  // put your setup code here, to run once:
  pinMode(led_pin, OUTPUT);
}

void loop() {
  // put your main code here, to run repeatedly:
  digitalWrite(led_pin, HIGH);
  delay(1000);
  digitalWrite(led_pin, LOW);
  delay(1000);
}
After writing the code, connect your Arduino Uno board to your computer using a USB cable. Then, open the Arduino IDE, and click on the upload button to upload the code to the board.
Most important thing is to make sure you connect the ~9 pin to right under the right leg of the resistor in the F row with a wire.
As for the GND pin, connect it to the hole under the LED left leg in the same row.
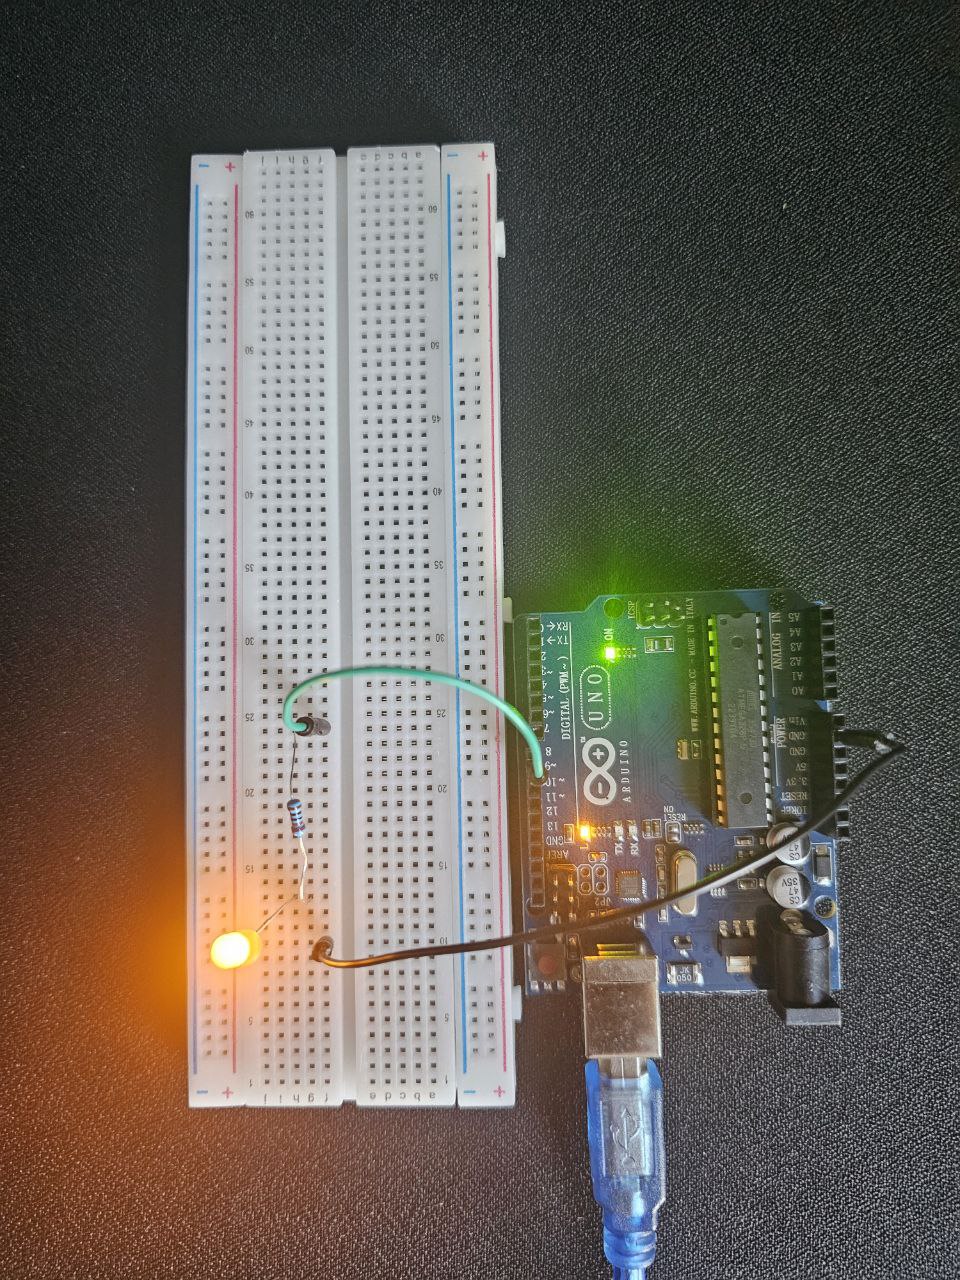 Blinking LED